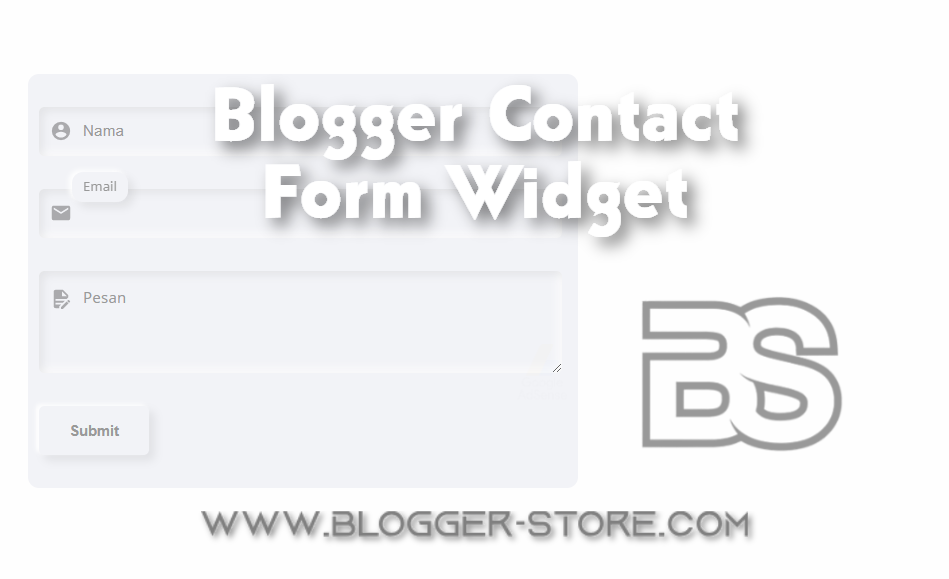
Blogger Contact Form Widget
 |
| Blogger Contact Form Widget |
Hello everyone, on this occasion I will share how to create a blogger contact page with a blogger-store style.
in my previous post I also shared how to create a contact page on blogger / blogspot with automatic email notifications that is different from what I am currently sharing, namely using the contact form that has been provided by the blogger itself.
There have been many similar tutorials that have shared them, and for the js, of course you have seen it on every blog that shared the tutorial or maybe you are currently using the same js.
I myself got this contact form js on the template that I use, the median ui, here I redesigned it with my own css so that it looks more attractive and fresh.
so for those of you who are looking for a blogger contact form widget and haven't found a style that matches your template, or maybe you're bored with the old style and want to try a new look then you must try what I will share this time.
for the demo, please click the button below, ok for those of you who want to try it, let's see how.
blogger-store . Blogger Contact Form Widget
please go to blogger > page > + new page copy all the code below and paste it into your page with html mode give a contact name or it's up to you to be free, if you have click publish or update.
<style>
    /* css form Contact blogger design by blogger store */
    .bs-kntk-frm{position:relative;display:inline-block;width:100%;max-width:500px;padding:30px 10px 10px 10px;background-color:#f2f3f7;border-radius:10px}
    .bs-dt-inp{position:relative;margin-bottom:30px;margin-right:5px}
    .bs-dt-inp input[type=text]::placeholder,.bs-dt-inp textarea::placeholder{color:#999!important;font-size:14px}
    .bs-dt-inp input:focus::placeholder,.bs-dt-inp textarea:focus::placeholder {color: transparent!important}
    .bs-dt-inp label{border-radius:10px;color:#999;font-size:12px;font-weight:400;position:absolute;pointer-events:none;left:30px;top:-15px;transition:.2s ease all;padding:0 10px;background-color:#f2f3f7;box-shadow:-3px -2px 4px rgb(255 255 255 / 90%), 5px 5px 8px rgb(0 0 0 / 7%);display:none}
    .bs-dt-inp input[type=text]:focus + label,.bs-dt-inp input[type=text].show + label,.bs-dt-inp textarea:focus + label,.bs-dt-inp textarea.show + label{display:block;}
    .bs-dt-inp input[type=text],.bs-dt-inp textarea,.bs-dt-inp.outset input[type=button]{background-color:#f2f3f7;box-shadow: inset 0.2rem 0.2rem 0.5rem rgb(0 0 0 / 7%), inset -0.2rem -0.2rem 0.5rem rgb(255 255 255 / 90%);padding:15px 15px 15px 40px;border-radius:5px;border:none;outline:none;width:100%}
    .bs-dt-inp.outset input[type=button]{background-color:#f2f3f7;box-shadow: -3px -2px 4px rgb(255 255 255 / 90%), 5px 5px 8px rgb(0 0 0 / 7%);width: 100px;text-align: center;padding-left:15px;margin: -50px auto;color:#999;font-weight:bold}
    .bs-dt-inp.outset input[type=button]:active {box-shadow: inset 0.2rem 0.2rem 0.5rem rgb(0 0 0 / 7%), inset -0.2rem -0.2rem 0.5rem rgb(255 255 255 / 90%)}
    .bs-dt-inp input[type=text]:active,.bs-dt-inp input[type=text]:focus,.bs-dt-inp textarea:active,.bs-dt-inp textarea:focus{outline:none}
    .bs-knt-notif{color:#ff0000}
    .bs-dt-inp.icon-user:before{content:"";position:absolute;left:10px;top:0;bottom:0;width:20px;background:url("data:image/svg+xml,<svg xmlns='http://www.w3.org/2000/svg' width='25' height='25' viewBox='0 0 24 24' fill='%23aaaaad'><path d='M12,19.2C9.5,19.2 7.29,17.92 6,16C6.03,14 10,12.9 12,12.9C14,12.9 17.97,14 18,16C16.71,17.92 14.5,19.2 12,19.2M12,5A3,3 0 0,1 15,8A3,3 0 0,1 12,11A3,3 0 0,1 9,8A3,3 0 0,1 12,5M12,2A10,10 0 0,0 2,12A10,10 0 0,0 12,22A10,10 0 0,0 22,12C22,6.47 17.5,2 12,2Z'></path></svg>") center / contain no-repeat}
    .bs-dt-inp.icon-email:before{content:"";position:absolute;left:10px;top:0;bottom:0;width:20px;background:url("data:image/svg+xml,<svg xmlns='http://www.w3.org/2000/svg' width='25' height='25' viewBox='0 0 24 24' fill='%23aaaaad'><path d='M20,8L12,13L4,8V6L12,11L20,6M20,4H4C2.89,4 2,4.89 2,6V18A2,2 0 0,0 4,20H20A2,2 0 0,0 22,18V6C22,4.89 21.1,4 20,4Z'></path></svg>") center / contain no-repeat}
    .bs-dt-inp.icon-msg:before{content:"";position:absolute;left:10px;top:-50px;bottom:0;width:20px;background:url("data:image/svg+xml,<svg xmlns='http://www.w3.org/2000/svg' width='25' height='25' viewBox='0 0 24 24' fill='%23aaaaad'><path d='M6,2C4.89,2 4,2.89 4,4V20A2,2 0 0,0 6,22H10V20.09L12.09,18H6V16H14.09L16.09,14H6V12H18.09L20,10.09V8L14,2H6M13,3.5L18.5,9H13V3.5M20.15,13C20,13 19.86,13.05 19.75,13.16L18.73,14.18L20.82,16.26L21.84,15.25C22.05,15.03 22.05,14.67 21.84,14.46L20.54,13.16C20.43,13.05 20.29,13 20.15,13M18.14,14.77L12,20.92V23H14.08L20.23,16.85L18.14,14.77Z'></path></svg>") center / contain no-repeat}

    /* css darkmode sesuaikan class ( .drK ) dengan template yang kalian gunakan agar dapat berfungsi */
    .drK .bs-kntk-frm,.drK .bs-dt-inp label,.drK .bs-dt-inp input[type=text],.drK .bs-dt-inp textarea,.drK .bs-dt-inp.outset input[type=button]{background-color:#2d2d30;color:#aaaaad}
    .drK .bs-dt-inp input[type=text],.drK .bs-dt-inp textarea,.drK .bs-dt-inp.outset input[type=button]:active{box-shadow: inset 0.2rem 0.2rem 0.5rem rgb(36 36 36), inset -0.2rem -0.2rem 0.5rem rgb(32 32 32)}
    .drK .bs-dt-inp.outset input[type=button],.drK .bs-dt-inp label{box-shadow:-3px -2px 4px rgb(36 36 36), 5px 5px 8px rgb(32 32 32)}
    </style>

    <div class='bs-kntk-frm' id='ContactForm1'>
    <form name='ContactForm'>
    <div class='bs-dt-inp icon-user'>
    <input id='ContactForm1_contact-form-name' name='name' placeholder='Nama' type='text'/>
    <label>Nama</label>
    </div>
    <div class='bs-dt-inp icon-email'>
    <input id='ContactForm1_contact-form-email' name='email' placeholder='Email' type='text'/>
    <label>Email</label>
    </div>
    <div class='bs-dt-inp icon-msg'>
    <textarea id='ContactForm1_contact-form-email-message' name='message' placeholder='Pesan' rows='3'></textarea>
    <label>Pesan</label>
    </div>
    <div class='bs-dt-inp outset'>
    <input id='ContactForm1_contact-form-submit' type='button' value='Submit'/>
    </div>
    <div class='bs-knt-notif'>
    <div id='ContactForm1_contact-form-error-message'></div>
    <div id='ContactForm1_contact-form-success-message'></div>
    </div>
    </form>
    </div>

    <script>
    var inputs = document.querySelectorAll('.bs-dt-inp input[type=text], .bs-dt-inp input[type=email], .bs-dt-inp textarea');
    for (var i = 0; i < inputs.length; i++) {
        var input = inputs[i];
        input.addEventListener('input', function() {
            var bg = this.value ? 'show' : 'none';
            this.setAttribute('class', bg);
        });
    }
    </script>
blogger has updated the contact form so I have removed the js that is not in use anymore, so that this widget can run please read the following article update the blogger form contact script which is error
ok so that 's the blogger-store blogger contact form widget that I can share this time, hopefully it's useful and thank you for visiting.

