 |
| Reaction Buttons Blog Using Google Forms By Blogger Store |
Creating Reaction Buttons on Blogs - Reaction buttons or reaction buttons on blogs can represent readers' reactions or judgments about a post they read. Usually blog owners put it at the end of the article.
There are many third-party services for installing react button widgets on blogs, such as using the sharethis service. But what if you want to install reaction buttons without third-party plugins ?
We can use the modified Google Form to create reaction buttons on the blog, if you want to implement it please follow the following tutorial.
Reaction Buttons Blog Using Google Forms
Create a Google Form
Your first step should be to create a new Google Form from the following page.
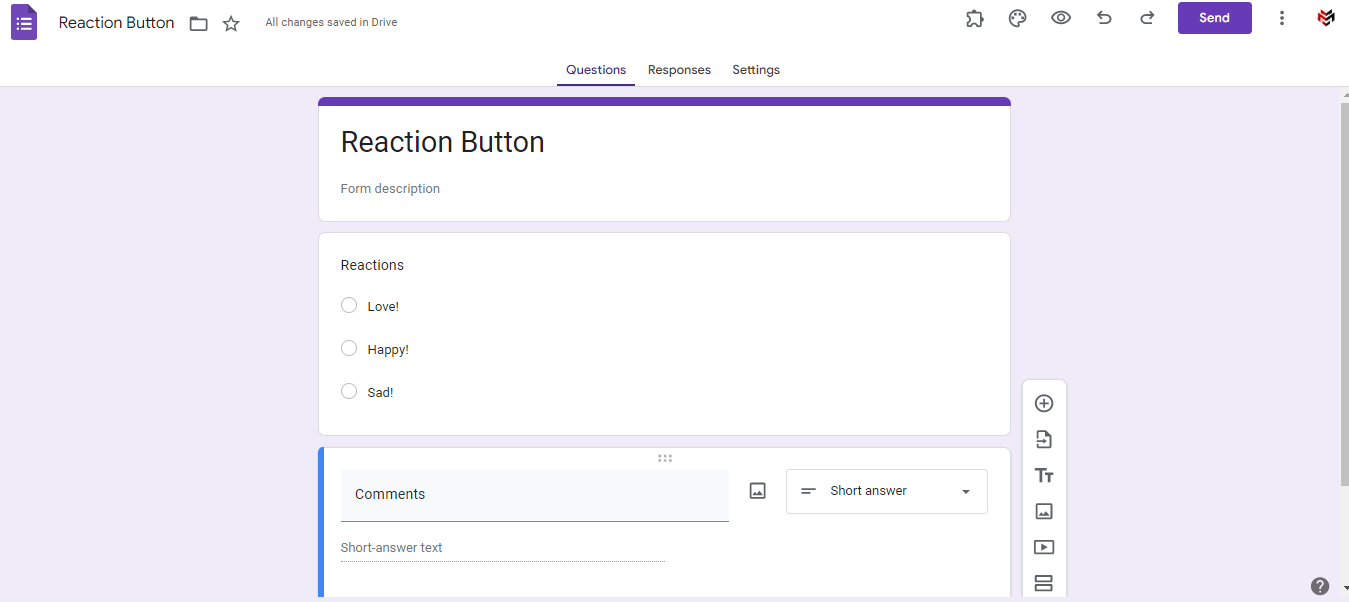
Then create items in the form as follows:

Information:
Article title | URL:Use the short answer text field typeReactions:Use multiple choice column type [radio button]- required or mandatory contents must be activated
Then make a selection of items such as like, love, sad. You can adjust the sentence according to your needs.
Get ID of Each Google Form Question
The second step is to take and copy the Enty ID form for each question from the Google Form source that we created earlier, using the Developer Tools or the convert google form to html tool .
To make it more practical here I use the google form html convert tool, then copy the ID marked as shown below

Information:
ID Form action:1FAIpQLSc7HqSMb1JHjsMb1wKk5-KuBmvj4GVPb7R2yc6knWkzoYfzZQentry ID Article title | URL:entry.798238143entry ID Reactions:entry.1853284040
Each ID will be different, so please copy the google form ID that you got from the form you created
Installing Reaction Buttons on Blogger
If you have followed the two steps above, the next step is to create a reaction button on the blog. Please follow the steps below:
- Enter page
draft.blogger.com - Click Theme > click Drop down > Edit HTML
- Search code
<data:post.body/>, Ctrl + F speeds up the search - Continue Copying the code below, then Paste just below
<data:post.body/>
<b:if cond='data:view.isPost'>
  <div class='reaction'>

    <!-- Specify the form submission URL -->
    <form action='https://docs.google.com/forms/u/0/d/e/ID_FORM_POST/formResponse' class='reaction-form' method='POST' target='send_reaction'>

      <!-- Specify article title and URL -->
      <input expr:value='data:post.title + " | " + data:post.url.canonical' name='entry.XXXXXXXXXX' readonly='readonly' type='hidden'/>

      <fieldset class='reaction-fieldset'>
        <legend>send reaction</legend>

        <!--Generate radio buttons for reaction answers in a loop-->
        <b:loop values='["Like!", "Love!", "Sad!"]' var='reaction'>
          <label class='reaction-lbl'><button class='reaction-button' expr:value='data:reaction' name='entry.XXXXXXXXXX' required='required' type='submit'><span><data:reaction/></span></button></label>
        </b:loop>

      </fieldset>

      <!-- Send complete message -->
      <div class='reaction-message' style='display:none'>Thank you for your reaction!</div>

      <!-- iframe element for post-send processing -->
      <iframe class='reaction-iframe' name='send_reaction' style='display:none'/>

    </form>
  </div>
  </b:if>
Information:
ID_FORM_POSTIsi dengan ID Form action PostXXXXXXXXXXFill with Enty IDXXXXXXXXXXFill with Enty ID["Like!", "Love!", "Sad!"]Replace with the reaction sentence according to the first step
The next step is to add the following code above the code in</body>
<b:if cond='data:view.isPost'>
  <script>//<![CDATA[
  window.addEventListener('DOMContentLoaded', () => {

    // Submission form, get iframe for processing after form submission
    const form = document.querySelector('.reaction-form');
    const iframe = form.querySelector('.reaction-iframe');

    // Flag initialization
    let submitted = false;

    // Set a flag when transmission is complete
    form.addEventListener('submit', () => {
      submitted = true;
    })

    // Runs when the iframe finishes loading
    iframe.addEventListener('load', () => {

      // Processing after completion of transmission
      if(submitted){

        // Get radio button group, submit button and submission complete message
        const fieldset = form.querySelector('.reaction-fieldset');
        const button = form.querySelector('.reaction-button');
        const message = form.querySelector('.reaction-message');

        // Disable radio button
        fieldset.disabled = true;

        // Disable/Hide Submit Button
        button.disabled = true;

        // Display send complete message
        message.style.display = 'block';

      }
    })
  })
  //]]</script>
  </b:if>
Lastly, add the following CSS just above the code </head>.
<b:if cond='data:view.isPost'>
  <style>
  /* Reaction */
  .reaction{margin:3em 0;line-height:1;color:#333}
  .reaction-fieldset{display:flex;justify-content:center;padding-bottom:0px;border:none}
  .reaction-fieldset legend{font-size:1.8rem;line-height:1.6;font-weight:bold;text-align:center}
  .reaction-fieldset label{margin:0 .25em}
  .reaction-fieldset span{padding:.75em .5em}
  .reaction-fieldset input:checked + span{font-weight:bold;color:#333}
  .reaction-button{display:block;margin:2em auto 0;background:#fa0000;color:#fff;padding:.75em 1.5em;border-radius:10px;border:none}
  .reaction-button:focus{outline:solid 2px #333;background:#fff;color:#333}
  .reaction-fieldset:not([disabled]) button:hover,.reaction-fieldset:not([disabled]) button:focus,.reaction-fieldset[disabled] button{background:#666}
  .reaction-message{margin-top:2em;text-align:center;color:#333;font-weight:bold}
  </style>
  </b:if>
When everything is done, click SAVE.
See the results of the Response Reaction Buttons
Now you can see the response results on the Google form from visitors who have responded to articles.
Reaction Buttons
Closing
So, that was Making Reaction Buttons on the Blog Using Google Forms . Hopefully this article can be useful. You can also share and recommend to friends who need it.
- https://www.marwat-tech.com/2023/04/creating-reaction-buttons-on-blog-using.html


